
The idea for this recipe came from my lovely neighbour Margaret. This recipe is based on her award-winning lemonade scone recipe - the one that knocked the seven-year scone champion from her throne. So, thank you Margaret for inspiring this vegan version.
This recipe was originally posted on January 22, 2021 and updated on June 25, 2021 with new images, instructions and recipe tips.
Why Make These Scones
Recipe review: "Such a simple recipe for great results that I will use again and again for entertaining. We loved these with jam and coconut yoghurt and a pot of tea! Thank you." (Michael) ★★★★★★★★★★
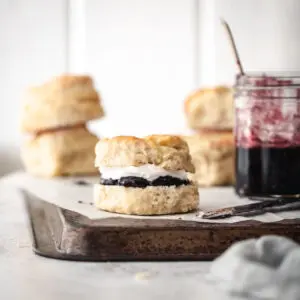
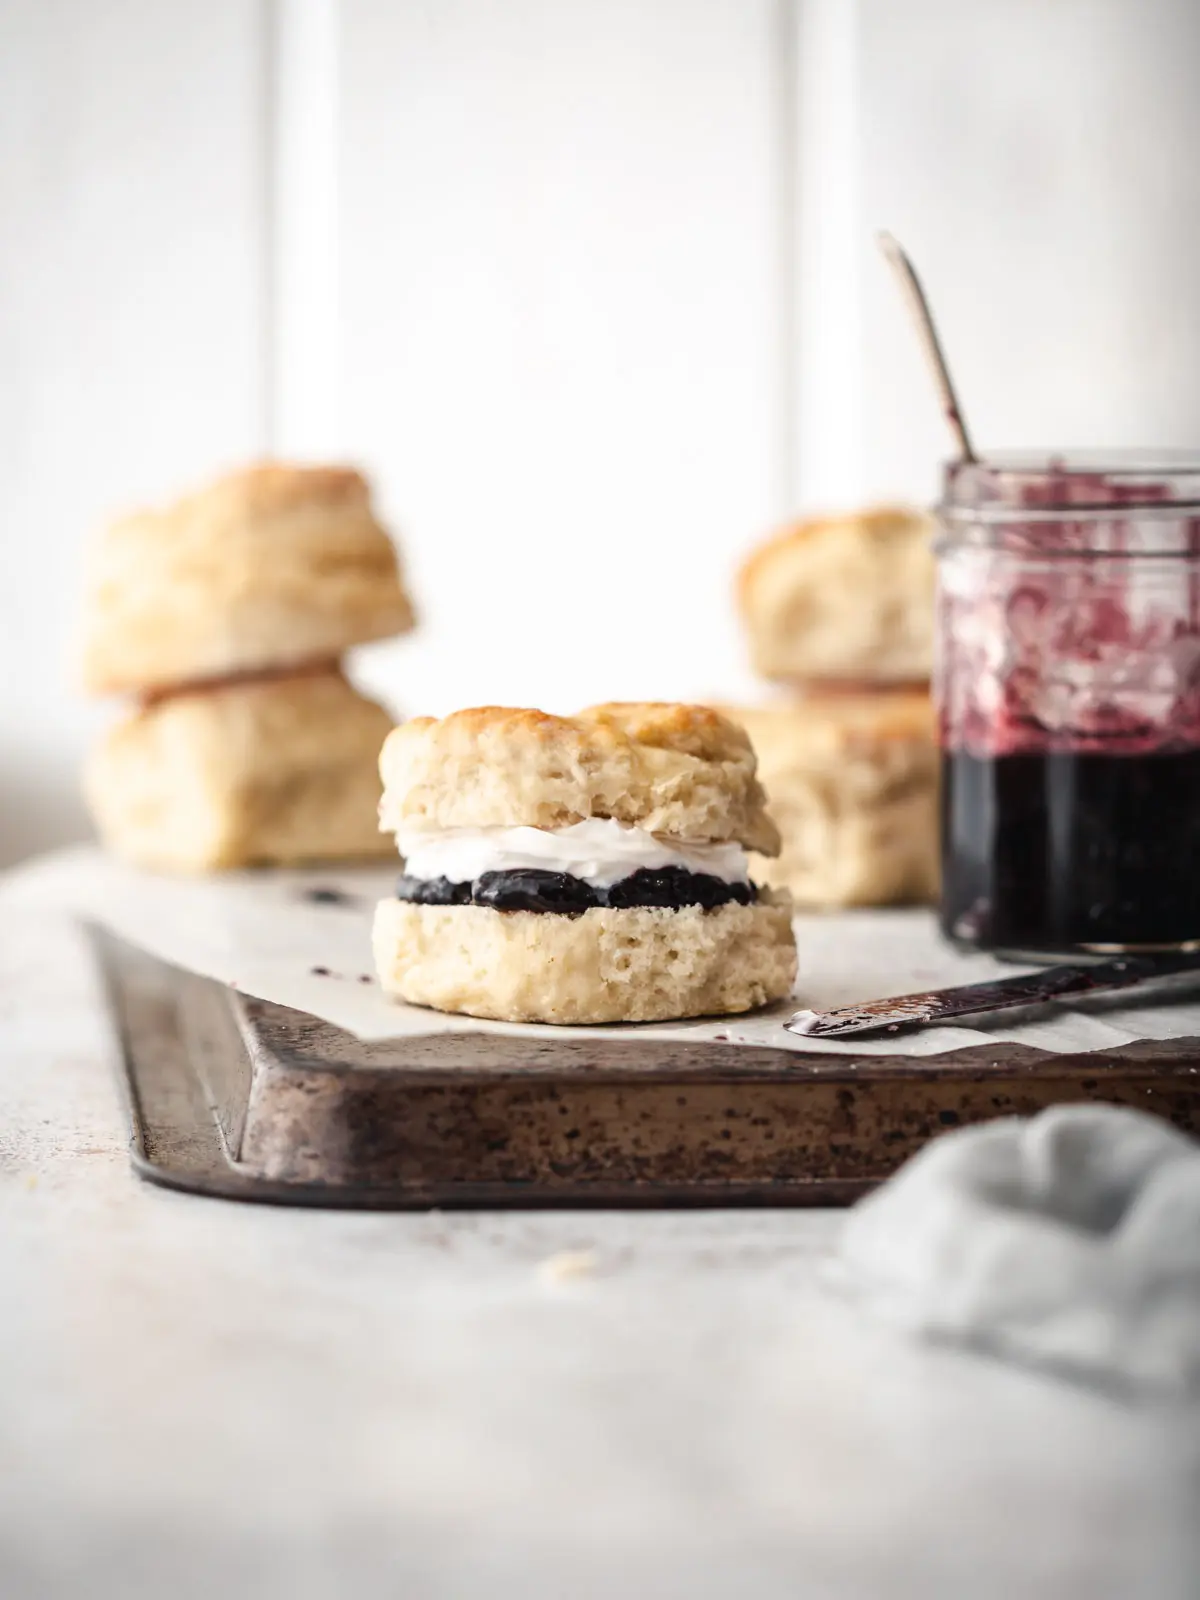
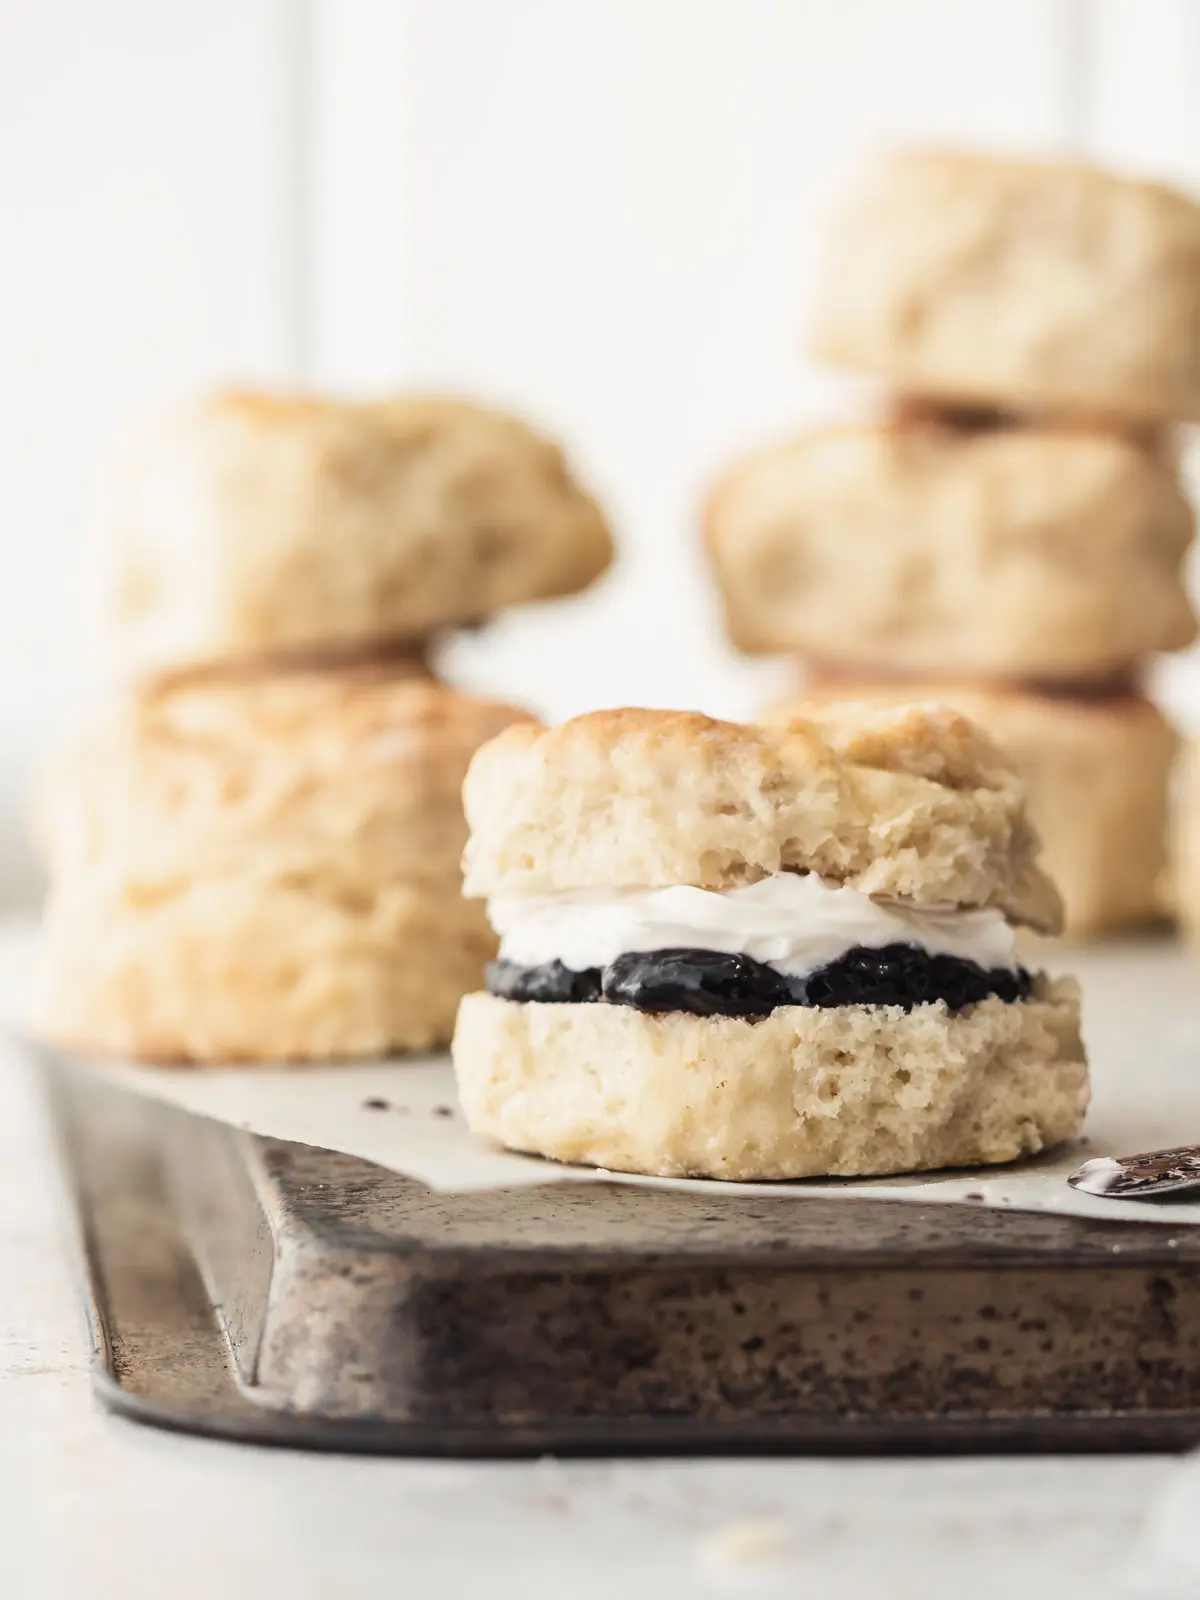
If you love a good scone with jam and cream, I think you'll love these vegan lemonade scones.
What are Scones?
Scones are a fluffy, biscuit-like baked good thought to have originated in Scotland. Originally made with oats on the griddle, today's version is made with flour and baked in a hot oven.
Scones - pronounced "skon" or "skoan" - are related to the griddle-baked flatbread called a bannock and are similar to American biscuits. Some believe the word scone comes from the gaelic word 'sgonn,' a shapeless mass — or large mouthful. This pretty much sums up how I eat my scones so we'll go with that.
OK, enough history. Let's get to the kitchen.
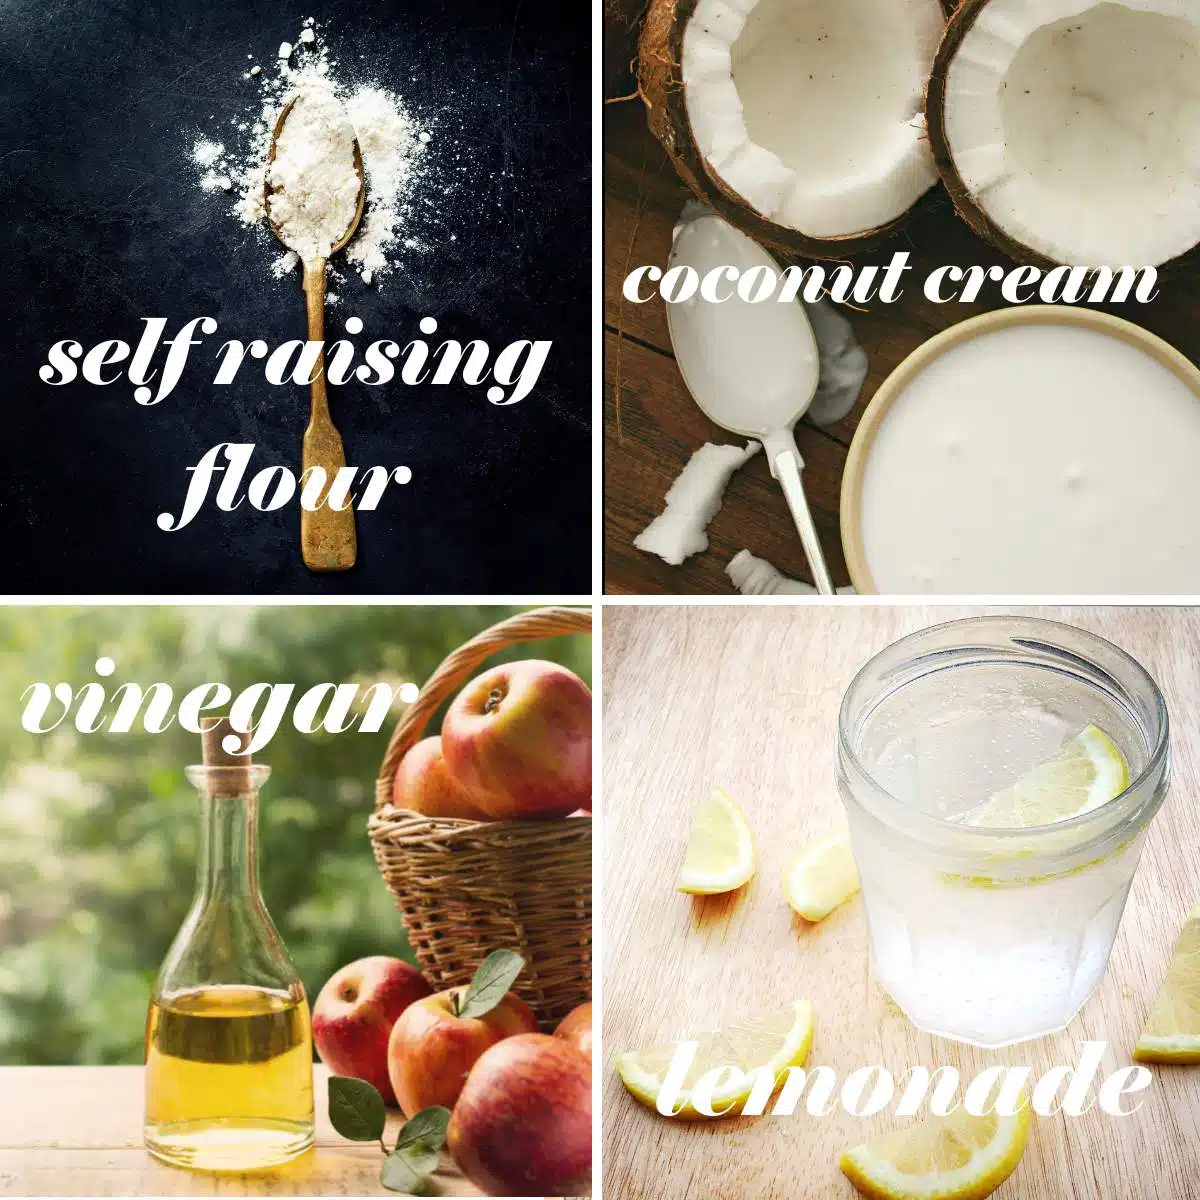
Ingredients in Lemonade Scones (+Substitutions)
Cook's note: The trick to Margaret's original award-winning recipe is to use cream that is just beginning to sour. So for this recipe, we are adding a touch of apple cider vinegar.
Lemonade. By lemonade, I am talking about "Sprite"-style lemonade, not American lemonade made with lemons, water and sugar. You can make this recipe with soda water too, although they will be less sweet. The cold carbonated liquid works with the flour to create rise by trapping bubbles in the dough.
Plant-based cream. Because we are making dairy free scones, we're using full-fat cream. Don't use lite. The scones are less fluffy if they don't have enough fat in them. You can also use other vegan creams such as Oatly. If you are using canned coconut cream, make sure to shake the can well.
Apple Cider Vinegar. To re-create Margaret's slightly sour cream, we are adding a little apple cider vinegar. ACV also helps to make these vegan scones deliciously light and fluffy.
Self-Raising (rising) Flour. Using self-raising flour is common here in Australia but you can make your own if you don't keep any in the cupboard. Sift 1 cup of flour and 2 teaspoons of baking powder together for 1 cup of homemade self-raising flour.
How To Make Vegan Scones
You'll find full instructions and measurements in the recipe card at the bottom of the post.
Step 1.
First sift the flour in to a mixing bowl and create a well. Add the lemonade, coconut cream (or vegan cream) and apple cider vinegar.
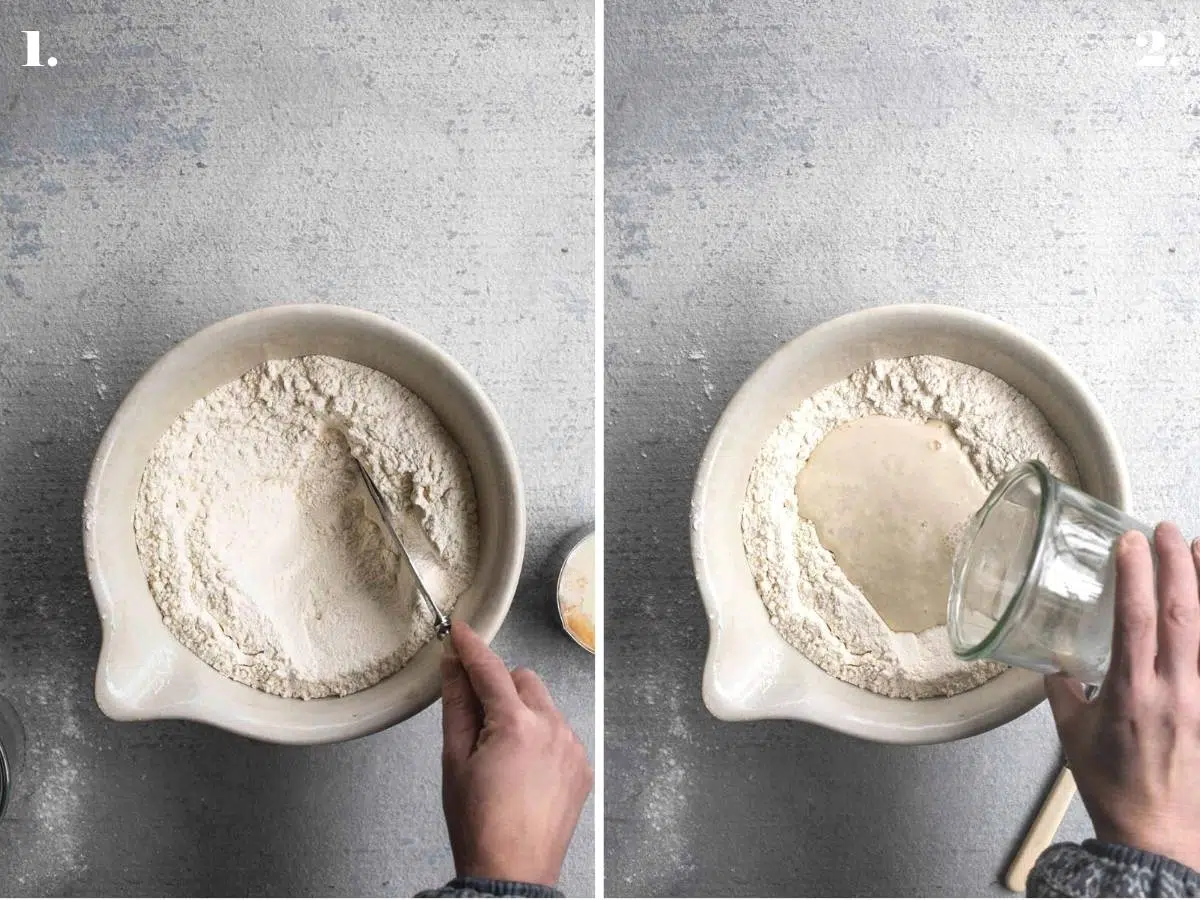
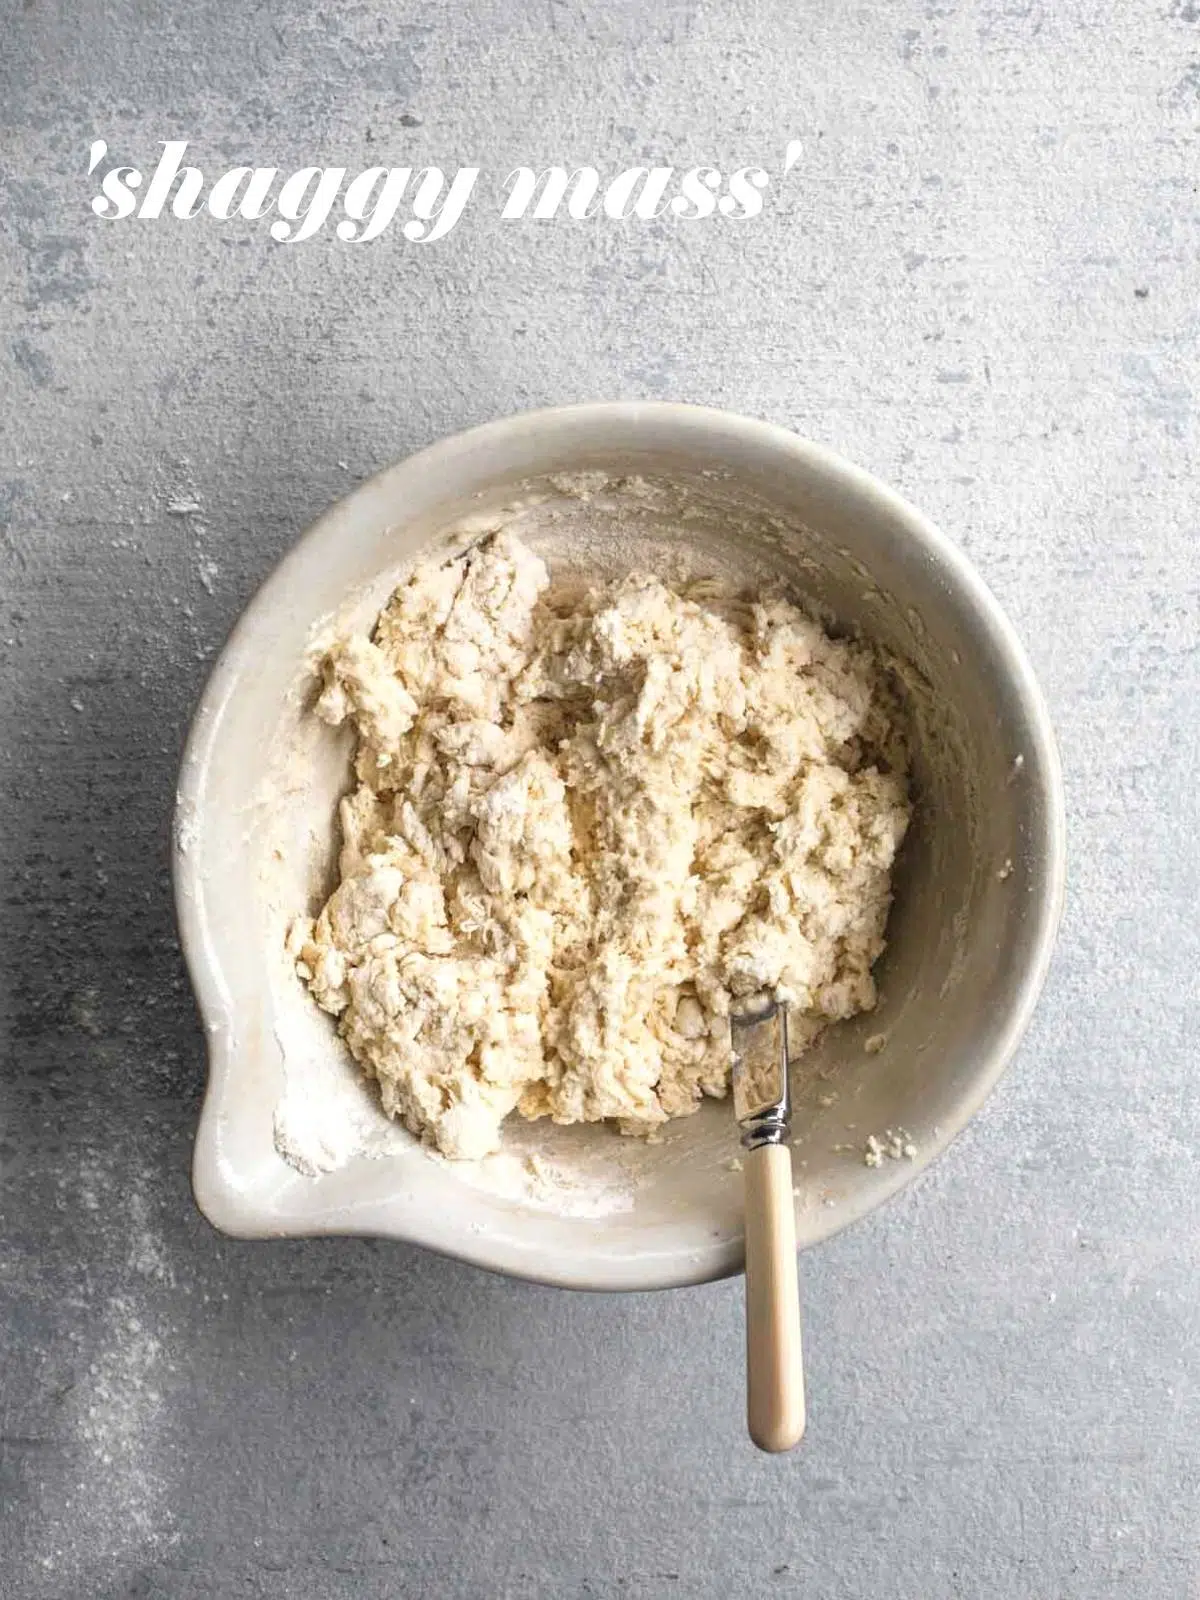
Step 2.
Using a butter knife, bring the mixture together to a rough dough. Random factoid, this texture is called a "shaggy mass".
Step 3.
Tip the dough out on to a floured surface and bring it together in to a rectangle at least an inch thick. The dough is super sticky but it's supposed to be. Go with it and have fun with the happy mess.
Step 4.
Using a round cookie cutter, cut the dough in to rounds and transfer them to a lined baking tray. Place them so they are just touching. Reform the dough in to a rectangle when you run out of space and continue until all the dough is used.

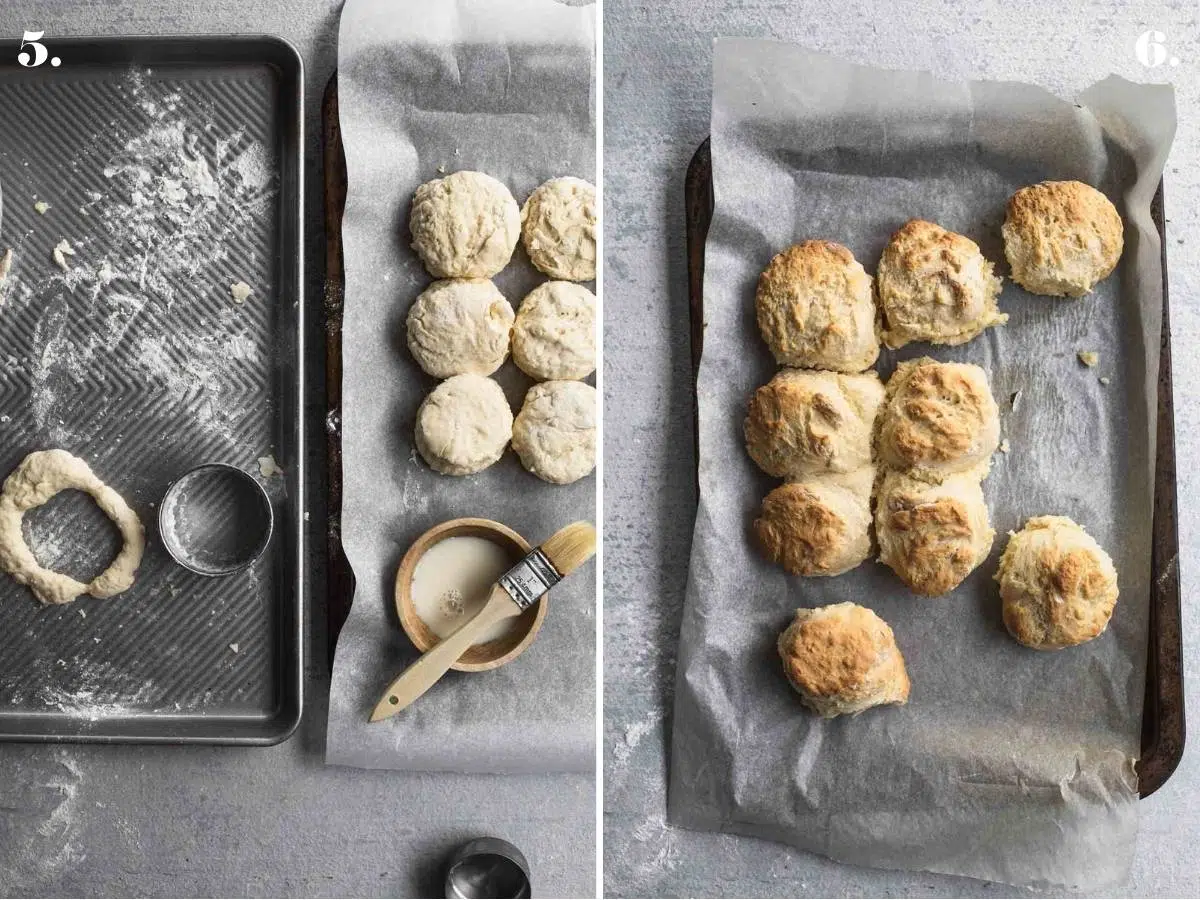
Step 5:
Brush the scones with coconut milk or any dairy-free milk and bake in a hot oven for around 20-minutes or until golden.
How to Make Perfect Vegan Scones (don't skip this)
This recipe for vegan scones is so simple with only 4-ingredients. Ready in under 30-minutes, they are perfect for a quick afternoon treat.
Serving Suggestions
You can't go past raspberry jam and whipped coconut cream on vegan scones, but here are a few other topping ideas to inspire your next afternoon tea.
FAQs
I use Schweppes or Kirks in lemonade scones - 7Up and Solo also work - anything fizzy and sweet! I've even read recipes where they used ginger beer.
Nope, you can use sugar-free lemonade, bubbly water, kombucha in your scones...one reader used elderflower cordial and her soda stream.
Vegan lemonade scones can be stored in an airtight container at room temperature for up to 3 days, or frozen for up to 3 months. Wait until they are completely cooled before popping them in the freezer.
Traditionally, lemonade scones are made with heavy cream. For a vegan version we are using full-fat coconut cream (shaken well) or a vegan cream such as Oatly cream.
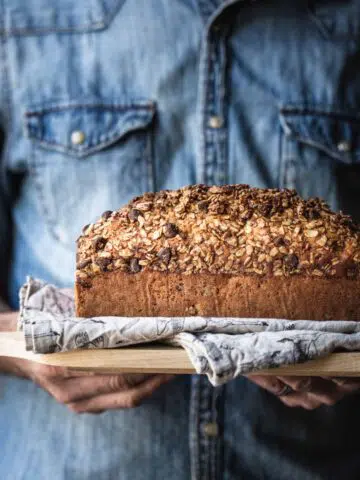
More Vegan Baking Ideas


Sign up to my newsletter and follow along on Facebook, Pinterest and Insta for all the latest news. If you like this recipe, please check out my cookbook "Great Vegan Meals for the Carnivorous Family" It's full of simple, carnivore-approved family recipes.
Make This Recipe
Vegan Scones with Lemonade
Equipment
- Round cookie cutter
Ingredients
- 3½ cups (525g) self-raising flour self-rising
- 1 cup (250ml / 230g) coconut cream full-fat or Oatly vegan cream
- ½ tbsp (10ml) apple cider vinegar
- 1 cup (250ml / 240g) lemonade Sprite, make sure it's nice and cold
Instructions
- Preheat oven to 210°C/410°F conventional or 190°C/374°F fan. Line tray with baking/parchment paper.
- Sift the flour in to a large mixing bowl and, using a butter knife, create a well in the centre.
- Add the coconut cream or vegan cream (shake the can well if you are using canned cream), apple cider vinegar and lemonade. Bring the mixture together using the butter knife.
- When it is loosely combined, tip the mixture out on to a floured surface. Touch the dough only enough to bring it together in to a rectangle.
- Dip a round cookie cutter in to flour and cut the dough in to rounds. Dip the cutter in to the flour after each round.
- Place the rounds so they are just touching on the prepared baking tray and brush them with a little milk.
- Bake them in the oven for 17-20 minutes or until risen and golden.
- Remove from the oven and separate to serve with jam and dairy-free whipped cream.
Notes
Nutritional Disclaimer
The nutritional information is an estimate only and is automatically calculated using online tools. For accurate results, we recommend calculating the nutritional information based on the ingredients and brands you use.
Beverley says
Hi, can you add fruit to the recipe?
Amanda says
Hi Beverley, great question. You can gently work in fruit like sultanas or blueberries into your dough before cutting. I hope you enjoy the recipe 🙂
Lisa says
Can these Vegan Scones be made in an Air Fryer and if so, what is the cooking time and temperature?
Amanda says
Hi Lisa, I haven't tested these scones in an air fryer, so I am afraid I have no advice here. I did find a link for you to try though - it's a non-vegan lemonade scone recipe made in an air fryer. The cook time and setting should be very similar. ---> https://www.taste.com.au/recipes/air-fryer-lemonade-scones-recipe/9zzfjgtm
🙂
Lee says
These are awesome. I'm in Australia and used Flora Thickened Plant Cream in the scones, brushed on the top and then whipped to serve with jam.
Amanda says
Hello to a fellow Aussie! I am so happy you enjoyed these. Flora cream is now one of my favourite things to use in cooking - I am so glad it is in the mainstream supermarkets now. It's so good. Thanks for reaching out, I really appreciate it. A.
Jen says
Amazing!! You wouldn’t know they’re vegan! They rise beautifully and are light and fluffy
Amanda says
Fantastic! I am so happy you enjoyed them, Jen. Thanks for letting me know. x
Mary-Ann Gordon says
Hi, my scones didn't rise, though my coconut cream wasn't chilled. I chilled the lemonade though. What did i do wrong.
my husband said they tasted like real scones. I have a conventional oven and at 210 degrees i needed to bake for about 26 mins.
Amanda says
Hi Mary-Ann. You didn't do anything wrong. It sounds like you followed the recipe and at the temp set, you should have gotten a nice rise. Perhaps the self-rising flour didn't have enough oomph? Maybe, add a wee bit of baking powder to the mix next time. You shouldn't need to, but if you aren't getting lift, you might need to give it a little hand. Maybe try 1 tsp of baking powder. You can also try the recipe with plain flour and add two and a half teaspoons of baking powder. Good luck 🙂
Brooke says
Hi, do you just pour the coconut cream in after shaking it?
You don't put the can in the fridge overnight to separate the cream from the liquid?
Amanda says
Nope. Just pour it in after you've given it a really good shake. We aren't separating out the liquids and solids. If you notice that's it's quite separated in the can, pop it into a bowl and give it a quick whisk to combine. 🙂
Brooke says
Thank you so much ☺️
I'm recently new to allergies/ low FODMAP and haven't made a recipe where you don't separate the cream yet.
I'll be making them gluten free as well, if I remember I'll let you guys know how they turn out.
Thanks again
Amanda says
Please do! Allergens and Fodmap are a whole new world, aren't they? My husband was on a grain free, fruit-free, low everything program for almost 6-months. It was an experience, I can tell you. Having said that, it inspired me to go back to university and do my post-grad in nutrition.
George Eats is a beautiful Low Fodmap blog I always drool over. You might enjoy it too. Good luck, Brooke. x
Here is the link - https://georgeats.com
Victoria Banks says
I followed the recipe and your helpful tips and they turned out perfectly. So soft and fluffy with a nice crisp top. Absolutely delicious. Thank you 🙂
Amanda says
Amazing! I am so happy you enjoyed them. Thanks for letting me know, Victoria 🙂
Tralee says
Turned out great but don't taste anything like a traditional scones. Taste more like a bread roll. I think they need to be made sweeter somehow! Hopefully the vegans will enjoy them.
Amanda says
Hi Tralee, thanks for the feedback. My non-vegan family loves them and using lemonade usually makes them a touch sweet. Traditional scones don't have sugar in them, do you usually add it? You could add a small spoon to the recipe if you prefer sweeter.
Cheers and thanks again. 🙂
Cecelia says
Hi,
Could you please tell me what the quantities are in grams and ml? I tried using conversions from online but the recipe turned out way to wet and the mix was very hard to work with.
Thanks
Amanda says
Hi Cecelia, thanks for the question. I have weighed and measured the ingredients (I used Oatly cream because that's what I have in the fridge today) and I have put the metric measurements in the recipe card. Having said that, the dough is super sticky and wet. I sometimes flour my hands to work with it - just a touch but also you flour your cutting ring each time - have a look at the recipe notes for some helpful tips. I hope that helps.:-) Good luck!
ps: the weights may seem heftier if you are not in Australia. I use Aussie cups and spoons but I have tested this recipe with US cups too. If the dough is too, too wet (the flour brand and humidity can affect that), add a tiny touch more flour - a spoon at a time. You want it sticky and wet but able to hold its shape. x
Cecelia says
Thank you so much Amanda for your super quick reply Looking forward to trying out the recipe again.
Looking at your flour amounts I definitely used too little flour! I am in Ireland and we don't usually use cup measurements here.
Thanks so much for all the tips
Amanda says
My pleasure! Have fun with it. x
Jodie says
These are amazing. Taste just like traditional scones, which is so good as my newborn is dairy free and now I don’t have to miss out. My hubby didn’t even realise they were vegan. Thank you!
Anne Cassimatis says
I prefer to use fresh sweet strawberries and a small amount of vegan margarine on top of the scones. Far more nutritious than jam and extremely tasty.
Jasmine says
Would give more than 5 stars! These were so fluffy and delicious. Thanks Amanda
Amanda says
Oh, you're awesome. Thanks Jasmine - I am so happy you enjoyed them 🙂
Michelle says
These did not work ,the coconut cream was too hard to incorporate because it was chilled.it just melted in the oven leaving holes in the scones
Amanda says
Hi Michelle, I am sorry the scones didn't work for you. I can only guess that perhaps the coconut cream needs a really good shake before going in. I have used different brands of coconut cream and not had this issue - and given that other readers haven't either and they would use different brands to me - it doesn't seem to be a brand issue. Having said that, maybe trying a brand from the Asian section of your supermarket - here in Australia it would be one like Ayam - might be better than organic brands that tend to separate more. I hope that helps but I can also direct you to a more traditional scone recipe made with vegan butter over at The Wallflower Kitchen. Take care.
Cat says
Do they taste of coconut?
Amanda says
Nope. My family is non-vegan and they don't really notice a different between these and regular scones. 🙂
Ruth says
YUM! Just made these using some homemade elderflower cordial and my soda stream because I didn't have any lemonade on hand. Added a splash of vanilla extract and a teeny bit of icing sugar to the mix as I wanted them to be on the sweeter side. They turned out perfectly, such an easy recipe and SO TASTY!
Also didn't have a cookie cutter so just sliced the rectangle into smaller pieces with a knife and then very gently shaped the pieces with my hands. Definitely more on the rustic side but it worked really well.
Wendy says
What is the apple cider for? I’ve never seen this in a scone recipe before.
Amanda says
Hi Wendy, the recipe is based on my neighbour's award winning scone recipe and she used cream that was almost sour. The apple cider vinegar is used to thicken our mixture and give the slightest of tang without using turned milk or cream. Odd, I know. But it works. 🙂
Nikki Glover` says
Can you use this recipe for pumpkin scones - we have so many pumpkins
Amanda says
Hi Nikki, I am jealous! I want more pumpkins. I haven't tried making this recipe with pumpkin but if I was going to, I might try: 3 and 1/2 cups of self-raising (rising) flour, three-quarters of a cup well mashed pumpkin, half a cup coconut cream, 1 tsp apple cider vinegar and half a cup lemonade. Sift the flour and salt into a large bowl. In a separate bowl whisk the pumpkin, milk and apple cider vinegar until smooth. Add it to the flour with the lemonade. Use a flat-bladed knife to stir until a sticky dough forms.
Good luck! I'd love to hear if you give it a go. 🙂
Michael says
Thanks for the temperatures. I guessed fan forced at 200 and they worked well for me. Such a simple recipe for great results that I will use again and again for entertaining. We loved these with jam and coconut yoghurt and a pot of tea! Thank you.
Amanda says
Perfect! Scones need a good hot oven - I've seen recipes with 220 degrees - but every oven is different. I guess 200 is your oven's sweet spot for scones. Nice. I am so glad you enjoyed them and thanks so much for taking the time to let me know, Michael. 🙂
Michael says
Hi, trying these today. Is your oven fan forced?
Amanda says
Hi Michael, I use a fan-forced oven but I have added the temps for both fan-forced and conventional ovens now. 🙂
Raj says
Just wondering: Why does it say to use cold milk when there's no milk in the recipe?
Amanda says
Because I am a goose! Sorry, Raj. I wrote milk instead of cream - thanks for pointing it out. I've fixed that now. 🙂
SARAH says
I've made regular lemonade scones before but never knew you could make a vegan version. This would be perfect for my friends with dairy free kids, thanks for the recipe!
Amanda says
Me too! I used to make them before I went vegan. I am so happy I can still have them. Thanks Sarah 🙂
Sylvie says
Love how quick and easy these are to make - who would have thought you could make scones with lemonade!?
Amanda says
It's amazing, right? They are super quick 🙂
Geraldine says
Could I add sultanas to this recipe to make a fruit scones or will they just sink?
Amanda says
Hi Geraldine. I haven't made these as fruit scones but I have seen lemonade scone recipes with sultanas. This recipe makes a light dough, but if you dust your sultanas with flour (just lightly toss them in a bowl with a little flour) and keep the weight of of the sultanas (maybe start with 2-3 tablespoons of fruit), they should stay put and not sink. I would love to hear how it goes if you do make them. 🙂 A.